Roof Lantern Installation
- Fixed quote before we start
- Roof never left open overnight
- 10-year workmanship guarantee

- Fixed quote before we start
- 10 years workmanship guarantee
- 25 years fitting rooflights
- Skylights only, not a general roofer
A roof lantern is the piece of a kitchen extension people notice from the doorway. It sits above the flat roof rather than in it, throws light down the middle of the room instead of across one edge, and it is the single detail that decides whether a new extension feels like a proper room or a corridor with a table in it.
It is also the detail most likely to leak, and the one most often specified by somebody who is not going to be on the roof when it rains. Roof lantern installation in Ipswich covers a genuinely mixed housing stock: Victorian terraces off Norwich Road with rear returns, 1970s semis in Kesgrave and Rushmere, timber-framed cottages inland, and new-build kitchen extensions going up around Grange Farm and Sproughton every month. Add the coast at Felixstowe and Harwich and you have four or five different structural problems wearing the same finished photograph.
We fit lanterns and we replace failed ones. We do not repair them, reseal them or patch them, and further down this page we explain plainly why that is the cheaper answer rather than the more expensive one.
The confusion worth clearing up first: lantern or flat rooflight?
More than half the enquiries we take for lanterns turn out, after ten minutes of conversation, to be enquiries for a flat rooflight. They are not the same product and they do not solve the same problem.
A flat rooflight is a single sealed glazed unit sitting almost flush with the roof, usually laid to a shallow fall of two or three degrees so water runs off. It has no ridge, no bars, and from inside it reads as a rectangle of sky. It is the cheaper option, the quicker option, and for a lot of side-return kitchens it is the right one. We cover it in detail on our flat roof skylight installation page.
A roof lantern is a pitched glazed structure that stands proud of the roof. It has a ridge along the top, rafters or glazing bars running down from that ridge to an eaves beam, and a self-supporting frame that carries its own glass. Typical pitch is somewhere between 20 and 25 degrees on modern aluminium systems, which is what gives the shape its presence from the garden.
The practical differences matter more than the aesthetic ones.
- Height. A lantern adds 300mm to 600mm above the roof deck depending on size and pitch. A flat rooflight adds around 100mm to 150mm. That difference is exactly what makes the permitted development question live for lanterns and mostly dead for flat units.
- Light distribution. The pitched faces of a lantern catch light from four directions across the day. A flat unit takes light from directly overhead. In a north-facing kitchen a lantern noticeably outperforms a flat unit of the same footprint on a dull February morning.
- Self-cleaning. A 25 degree pitch sheds rain properly. Debris and organic film run off. A flat unit at three degrees will hold a puddle in the middle and, in Suffolk, a ring of pollen and sea salt around the edge of it.
- Cost. Like for like, a lantern usually lands 30 to 50 per cent above a flat rooflight of the same footprint, because there is more frame, more glass area and more labour in it.
- Ceiling condition. A lantern needs a level, square opening and a kerb built to carry it. A flat rooflight is more forgiving of a slightly out-of-true opening.
The short version: if the room is over about 4m x 4m, or if the ceiling is going to be flat plastered rather than sloped, a lantern earns its extra cost. If you are lighting a narrow side return three metres wide, a flat rooflight will usually be the better buy and we will say so.
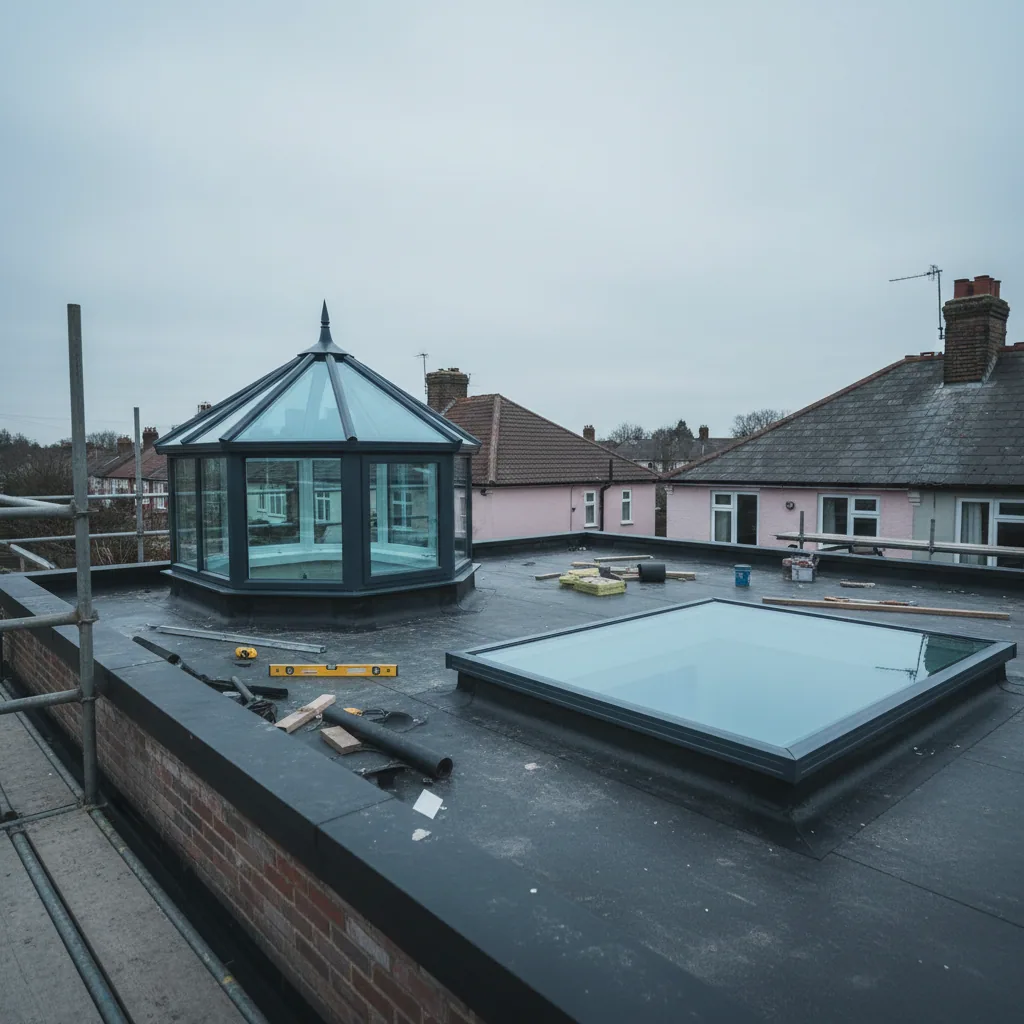
Can your roof actually carry it?
This is the question that gets skipped, and it is the one that produces the worst outcomes when it goes wrong. A roof lantern is heavy. A 3.0 x 2.0m aluminium lantern glazed in double units weighs somewhere in the region of 250kg to 320kg, and every kilo of that load arrives at the perimeter of the opening you have just cut in the roof.
Cutting a hole in a flat roof removes joists. Those joists were carrying the roof deck, the insulation, the covering and whatever snow and wind load the roof sees. Take three of them out for a 2m wide opening and the load has to go somewhere.
Trimmers, ring beams and the point where an engineer is needed
On a small opening, up to roughly 1.2m across, doubled-up timber trimmers on either side of the opening and at each end will usually carry it comfortably. The removed joists hang off the trimmers on joist hangers, and the whole thing behaves the way the original roof did.
Beyond about 1.5m, and certainly on anything over 2m, you are into a ring beam. That is a continuous structural frame, usually steel or engineered timber, running the full perimeter of the opening and picking up the loads from all four sides. On a new extension the ring beam should already be in the structural drawings. On a retrofit into an existing flat roof it very often is not, because the roof was never designed with a hole in it.
We tell people to get a structural engineer involved when any of the following apply:
- The opening is wider than 1.5m in either direction.
- The lantern is going into an existing flat roof rather than one being built new.
- The roof is a timber-framed or historic structure where joist sizes and spans are unknown and irregular. This is common across inland Suffolk and it is not a place for assumptions.
- The opening lands near a corner, near a valley, or within about 600mm of a supporting wall, where load paths get awkward.
- There is a party wall involved.
An engineer’s calculation for a domestic lantern opening is not expensive, typically a few hundred pounds, and it is the cheapest insurance on the whole job. Building Control will usually ask for it anyway on anything structural. We work to the engineer’s design; we do not design structure ourselves and we will not pretend otherwise.
The honest version. If we survey your roof and the structure will not take the lantern you want without work you have not budgeted for, we tell you at survey, before you have paid anything. That is a better conversation than the one where a scaffold is already up.
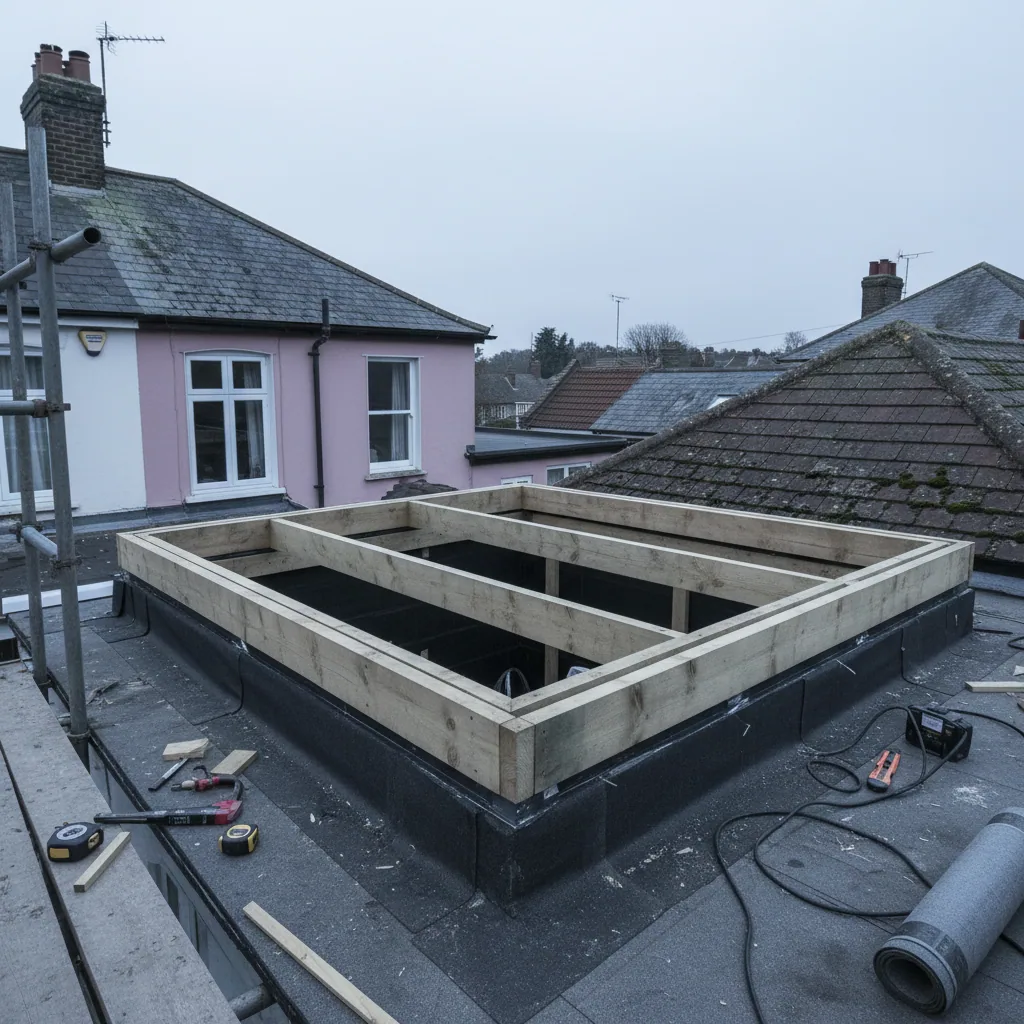
The kerb: where lanterns leak
If a roof lantern leaks, the glass is almost never the cause. Modern sealed units and gasket systems are good. The failure is at the kerb, sometimes called the upstand, which is the insulated box that raises the lantern above the roof surface and gives the roof covering something to turn up against.
Get the kerb right and the lantern is a non-event for twenty years. Get it wrong and no amount of sealant will save it.
Height
The kerb should stand a minimum of 150mm above the finished roof surface, measured at the lowest point of the roof’s fall. That is the figure to hold onto. Some manufacturers will quote 100mm as acceptable. On the Suffolk coast, where wind can drive standing water up a vertical face, 100mm is not enough and we will not build to it. On exposed sites at Felixstowe and Harwich we routinely go to 200mm.
The common error is measuring 150mm at the high side of a falling roof and ending up with 90mm at the low side, which is where the water actually collects.
Fall
The roof around the kerb must fall away from it, not towards it, at a minimum of 1:80 design fall. Because timber deflects and firrings are rarely perfect, the industry works to 1:60 or 1:40 in practice to guarantee a finished 1:80. Water sitting against a kerb is the beginning of every kerb failure we have seen.
Construction and insulation
A kerb should be built as an insulated box, not a bare timber frame. Uninsulated kerbs create a cold bridge right around the perimeter of the lantern, and the result shows up in January as a line of condensation on the plasterboard reveal that the homeowner reasonably assumes is a leak. We build kerbs with insulation to the outer face, continuous with the roof insulation, so the thermal line is unbroken.
The covering detail
The roof covering, whether that is EPDM, GRP, single-ply or felt, turns up the full height of the kerb and is dressed over the top edge, then the lantern’s own flashing or the frame itself sits over that. Water has to travel uphill twice to get in. On our jobs the covering is terminated under a proprietary trim or a welded corner, not stopped short and sealed. Sealant is a gasket, not a waterproofing layer, and any detail whose watertightness depends on it will fail in about five years.

Glazing: what the numbers actually mean
Roof lantern glass is specified differently from vertical window glass, because a lantern faces the sky. It gets more solar gain per square metre than any window in the house, it radiates heat to a cold night sky, and the outer pane must be toughened while the inner pane must be laminated so that nothing falls into the room if it breaks.
Double or triple
Double glazing with a warm-edge spacer, argon fill and a soft-coat low-emissivity layer will get a good aluminium lantern to a whole-unit U-value of around 1.2 to 1.4 W/m²K. Triple glazing pushes that to roughly 0.9 to 1.1, but adds around 40 per cent to the glass weight, which feeds straight back into the structural question above. For most Suffolk kitchen extensions double glazing with a proper solar control coating is the better specification. Triple earns its place on very large lanterns, on passive-standard builds, and where the room is genuinely north-facing and heat loss dominates.
Solar control and g-value
The g-value is the proportion of solar heat that passes through the glass. A g-value of 0.6 lets 60 per cent through. Standard clear double glazing sits around 0.6 to 0.7, which over a 3.0 x 2.0m south-facing lantern is a serious amount of heat arriving in a room with a flat ceiling and nowhere for it to go.
For any lantern facing south or west, we specify a solar control coated unit with a g-value between 0.28 and 0.38. Modern coatings do this while keeping light transmission above 60 per cent, so the room stays bright and does not read as tinted. Blue-tinted solar glass is largely a thing of the past. If your quote from anyone does not mention a g-value on a south-facing lantern, the specification has not been thought about.
Self-cleaning coatings
A self-cleaning outer coating is a hydrophilic layer that breaks down organic film in daylight and lets rain sheet off rather than bead. On a lantern at 25 degrees it works well and it is worth having, because you are not going to be up there with a squeegee. It does not eliminate cleaning, and it does very little against the salt film you get within a mile or two of the coast, which needs rinsing with fresh water once or twice a year.
Part L
Under the current Part L standards for England, replacement rooflights in existing dwellings must meet a whole-unit U-value of 2.2 W/m²K or better, measured in the vertical plane, which is the assessment convention rooflights are held to. New-build work is tighter and is set by the SAP calculation for the whole dwelling rather than by a single element figure. In practice every lantern we fit comfortably beats the replacement threshold, and the reason we quote real numbers is so you can compare like with like against other quotes.
| Specification | Whole-unit U-value (W/m²K) | g-value | Light transmission | Best suited to |
|---|---|---|---|---|
| Double, clear, argon, warm-edge | 1.3 to 1.5 | 0.60 to 0.70 | 75 to 80% | North-facing rooms, shaded plots, smaller lanterns |
| Double, solar control, argon, warm-edge | 1.2 to 1.4 | 0.28 to 0.38 | 60 to 68% | Our default. South and west facing kitchen extensions |
| Double, solar control plus self-cleaning outer | 1.2 to 1.4 | 0.28 to 0.38 | 60 to 66% | Anything you cannot easily reach to clean |
| Triple, solar control, argon | 0.9 to 1.1 | 0.30 to 0.40 | 55 to 62% | Large lanterns, low-energy builds, heavy heat-loss concern |
| Part L replacement minimum (England) | 2.2 or better | not specified | not specified | The legal floor, not a target |
Figures are typical whole-unit values for aluminium lanterns of 2.0 x 1.0m and above. Smaller units carry proportionally more frame and perform slightly worse. Your survey confirms the exact specification.
If glazing performance is the main driver for your project, our energy efficient skylight installation page goes further into U-values, thermal bridging and how rooflight specification interacts with the rest of the building fabric.

Frames: aluminium, timber and why we rarely fit uPVC
Aluminium is what most modern lanterns are, and for good reason. It is strong enough to be slim, so the glazing bars on a Korniche, Roof Maker or Atlas style system are narrow and the glass area is high. A well-made aluminium lantern will have a polyamide thermal break, which is an insulating strip running through the profile separating the cold outside face from the warm inside face. Without a thermal break, aluminium conducts heat straight out of the room and drips condensation onto your worktop in winter. Check for it. It is the difference between a good lantern and a cheap one that looks identical in a photograph.
Finish is powder coating to a RAL colour. Anthracite grey, RAL 7016, is the default for maybe seven out of ten jobs we quote. Black, RAL 9005, is increasingly asked for. White, RAL 9010, still suits period properties and painted timber joinery better than grey does. Dual colour is available on most systems, so you can have grey outside and white inside for a few hundred pounds more, and on a conservation-sensitive property that is often the sensible compromise.
Timber lanterns, usually engineered laminated softwood or hardwood with an aluminium capping over the external face, are the right answer on listed buildings, in conservation areas, and on period properties where a slim modern aluminium frame would look wrong. They cost more, typically 40 to 70 per cent above an equivalent aluminium unit, and they need the internal faces redecorated every eight to ten years. The bars are chunkier, which some people want and some people do not. On a Georgian or Victorian property in central Ipswich, or on a cottage inland, timber often reads correctly where aluminium does not.
uPVC lanterns exist. We rarely fit them. The profiles have to be thick to achieve the strength, so you lose glass area and gain a heavy visual frame, and the white does not stay white. The saving over aluminium is smaller than people expect once you are comparing units with equivalent glazing. We will fit one if you specifically want one and it is the right call for your budget, but we will tell you what you are giving up.
Sizing, bars and proportion
Lanterns are sold by external kerb dimension, and the number of glazing bars follows from the width. A 1.0 x 1.0m lantern is a simple hipped shape with a bar at each corner and no intermediate bars. By 2.0 x 1.0m you have a short ridge and typically two intermediate bars per side. At 3.0 x 2.0m you are looking at four or five bars a side.
Bars are structure, not decoration. You cannot simply ask for fewer of them on a large unit, because each bar carries a share of the glass weight and the wind load. What you can do is choose a system with a stronger bar profile, which lets a manufacturer span further between them. That is one of the real differences between the premium aluminium systems and the budget ones.
On proportion, the guidance we give at survey:
- Aim for the lantern to cover roughly 15 to 20 per cent of the floor area of the room below. A 5m x 4m kitchen diner is 20m², so a lantern of about 3.0 x 1.5m sits in the right band.
- Leave at least 500mm of flat roof between the kerb and any parapet, wall or edge, so the covering can be dressed properly and so somebody can physically get round it to work.
- On a rectangular room, match the lantern’s long axis to the room’s long axis. A square lantern in a long thin room looks like an afterthought.
- Above about 3.0 x 2.0m you are usually into either a structural upgrade, a crane lift, or a multi-section lantern with a structural spine. All three change the price materially, and all three are decisions to make before the roof is built rather than after.
If the room does not suit a standard rectangle, or you are working around an existing steel or a chimney breast, our custom skylight design service covers non-standard shapes, pyramid and multi-ridge configurations, and units built to a surveyed opening rather than a catalogue size.

Coastal specification: why standard fittings fail early here
Most lantern systems are sold across the whole country to a single specification. That specification is written for inland conditions, and it does not survive the Suffolk and north Essex coast well.
Within roughly a mile of open sea at Felixstowe, Harwich, Aldeburgh, Southwold, Frinton or Clacton, three things happen faster than the manufacturer’s testing anticipates. Salt-laden air deposits chloride on every exposed surface. Wind-driven rain arrives horizontally rather than vertically, so it attacks the vertical face of the kerb and the underside of flashing laps. And the wetting and drying cycle keeps chloride concentrated at fixing heads rather than washing it away.
What we change for coastal work:
- 316L stainless fixings throughout. Not A2 grade 304, and certainly not zinc-plated steel. The molybdenum content in 316L is what resists chloride pitting. A 304 screw at Felixstowe will show rust staining down the frame within two or three winters. This is the most visible early failure and it is entirely avoidable.
- Marine-specification powder coating. That means a pre-treatment and coating system rated for coastal exposure, which most manufacturers offer as an upgrade rather than as standard. On a lantern it typically adds a modest amount to the unit cost and it extends the finish guarantee considerably.
- Increased kerb height. 200mm rather than 150mm on exposed sites, because driven rain climbs.
- Upgraded flashing laps. Longer laps and mechanically fixed terminations rather than adhesive-only details.
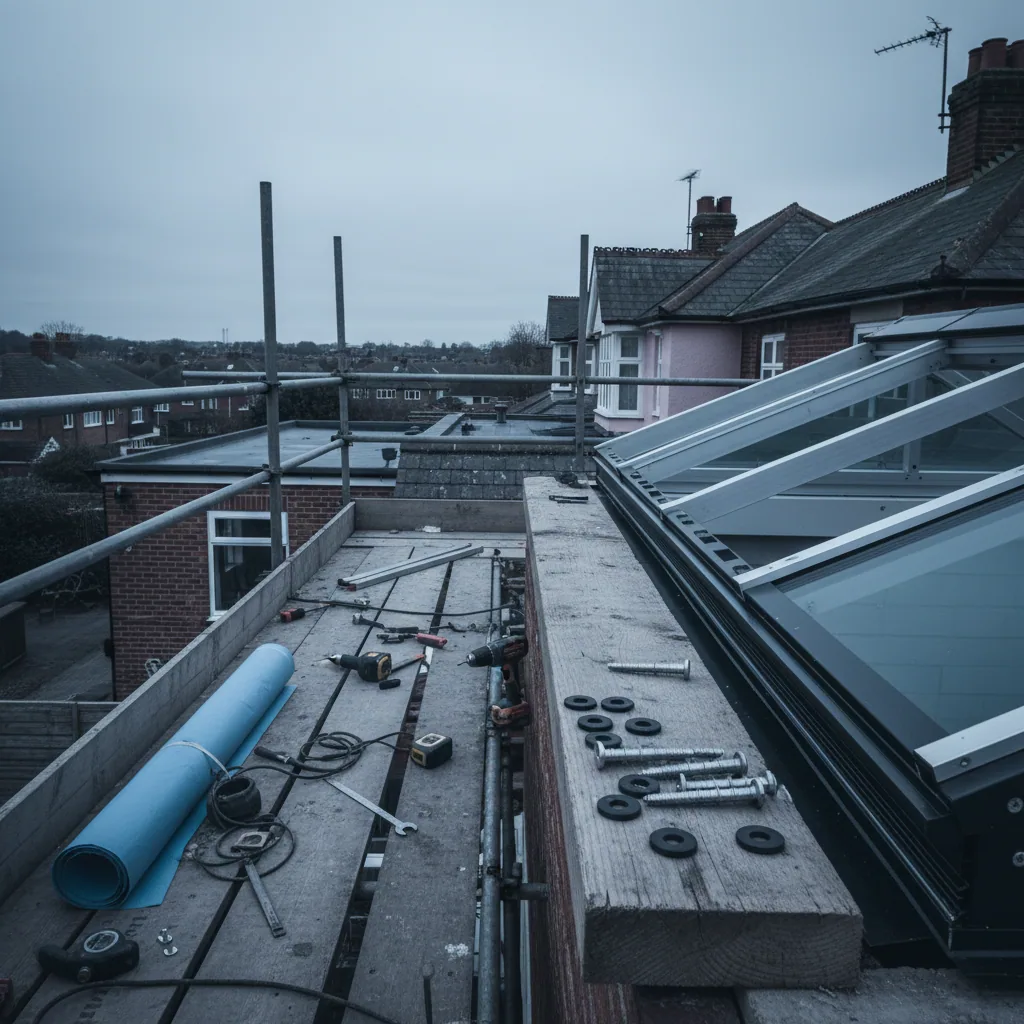
- Isolation of dissimilar metals. Aluminium in direct contact with steel in a salt environment sets up galvanic corrosion. We isolate with proprietary washers and tapes rather than hoping.
Estuarine locations are a different case and we treat them differently. Woodbridge, Wivenhoe, Manningtree, Shotley and Pin Mill sit on tidal saline water with real wind exposure across open water, but they do not carry full open-sea salt loading. Upgraded fixings make sense there. Full marine specification is usually not necessary, and we are not going to sell it to you as though Woodbridge were Southwold. See our pages for Felixstowe, Woodbridge and Colchester for how the specification changes by location.
Building Regulations, planning and conservation
Planning permission
Most roof lanterns on a rear extension fall under permitted development, but the rule that governs it is worth understanding because lanterns sit close to the line. Permitted development for roof alterations generally allows an addition that projects no more than 150mm above the existing roof plane and does not sit higher than the highest part of the roof.
A lantern on a 150mm kerb with a 300mm pitched glazed section is roughly 450mm above the roof plane, which is beyond that allowance on its face. In practice, where the lantern is on a new rear extension the whole extension is being assessed as one, and the lantern is dealt with as part of that permission or that permitted development calculation, not as a separate roof alteration. Where you are retrofitting a lantern onto an existing flat roof, the 150mm rule becomes directly relevant and a lawful development certificate is worth having.
Conservation areas and listed buildings
Suffolk and north Essex carry an unusually high density of conservation areas and listed buildings. Lavenham, Aldeburgh, Southwold, Dedham, Coggeshall, Clare and a large part of central Ipswich are all constrained, and Article 4 directions in some areas remove permitted development rights that would apply elsewhere.
What this means in practice:
- On a listed building, listed building consent is required for a lantern regardless of where it sits, including on a modern rear extension attached to the listed structure. There is no permitted development route.
- In a conservation area, a lantern to the rear, not visible from the street, is often acceptable. Anything visible from a public highway usually is not, or will need a conservation-style unit with slimmer or more traditional bar profiles.
- Timber frames with a painted finish are far more likely to be approved than slim anthracite aluminium in a sensitive setting.
- Talk to the conservation officer at Ipswich Borough, East Suffolk, Mid Suffolk, Babergh or Colchester before you order anything. They are generally helpful and an early conversation saves a refused application.
Building Control
A roof lantern in a new extension is covered by the extension’s own Building Control application. A lantern retrofitted into an existing roof is notifiable work in its own right, because it is a structural alteration and a thermal element change. Part L covers the U-value, Part K covers guarding where glazing is at low level, and the structural opening is assessed against the engineer’s calculations. Retrofit work goes through a building notice or full plans application to your local authority Building Control, which we handle for you, and we will tell you which route your job needs at survey.
Condensation and overheating
These are the two complaints that arrive twelve months after a lantern is fitted, and both are specification problems rather than maintenance problems.
Condensation on the inside of a lantern comes from one of three places. A cold-bridged kerb, which we deal with by insulating the kerb continuously with the roof. A frame without a thermal break, which we deal with by not fitting them. Or genuinely high humidity in the room with nowhere to go, which is common in kitchens where the extractor recirculates rather than vents outside. If a kitchen is producing a lot of moisture and the only ventilation is a charcoal filter, a lantern will show it up, and no glazing specification will fix that.
Overheating is the more common one. A south-facing lantern with clear double glazing over a kitchen with a flat plastered ceiling will make that room noticeably hotter than the rest of the house from May to September. The fix is at specification: a solar control coating with a g-value around 0.3, and an opening vent so hot air at ceiling level has somewhere to go. Most aluminium systems offer an electric opening vent as a factory option, typically adding a few hundred pounds, and on a large south-facing lantern it is money well spent. Retro-fitting one later is a much bigger job.
Replacing a failed lantern
A lantern fitted in the mid-2000s is now approaching or past twenty years old, and a lot of them are failing at once. The symptoms are consistent: misting between the panes where the sealed unit has lost its edge seal, water tracking down the inside of a glazing bar, brown staining on the plasterboard reveal, cold draughts along the ridge, and gaskets that have gone hard and shrunk back at the corners.
The trade default is to reseal it. We do not offer that, and here is the arithmetic behind that decision.
A reseal on a failed lantern costs a few hundred pounds and typically buys twelve to eighteen months. It does not address the failed sealed units, it does not address perished gaskets, it does not address a kerb that has been wet for three years, and it does not address the timber underneath that kerb, which is usually the real problem by the time water is visible inside. Repeat that reseal three times over five years and you have spent a meaningful fraction of a replacement while the underlying decay carries on. Meanwhile the room stays cold, because a lantern from 2005 has a U-value around 2.8 to 3.2 W/m²K against roughly 1.3 for what we would fit today.
Replacement is a different proposition. We take the old unit off, expose the kerb, and inspect the timber properly. Where the kerb is sound we rebuild the covering detail and set the new lantern on it. Where it is not, and on failed lanterns it frequently is not, we rebuild the kerb, which is the only intervention that actually ends the problem. Then the new unit goes on with a 10-year workmanship guarantee behind it.
Patching buys a season. Replacement ends it. If your lantern is misting, draughty or tracking water, the honest answer is that a repair is a payment plan for a replacement you are going to buy anyway. We would rather tell you that now than take money for a reseal.
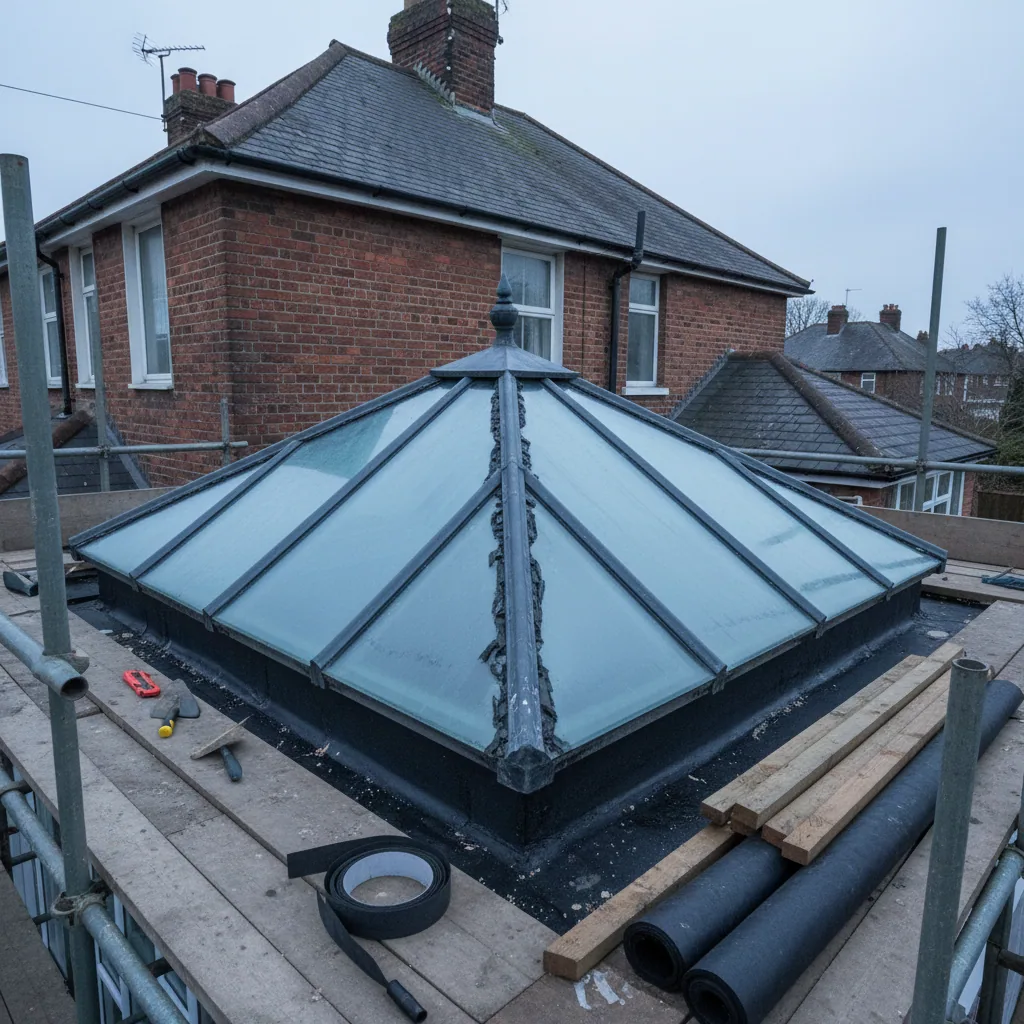
How we fit it, stage by stage
The question we get asked most is how long the roof is open. On a straight replacement it is usually a matter of hours, not days, and it is never overnight. Here is the actual sequence.
- Survey and fixed quote. We measure the opening or the proposed opening, check the roof structure, check the fall of the existing roof, look at the covering, assess exposure, and confirm orientation for the glazing specification. You get a written fixed price. That price does not move unless you change the specification.
- Order and lead time. Aluminium lanterns are made to your surveyed size. Lead time is typically three to five weeks for standard sizes and colours, longer for dual-colour finishes, marine-specification coatings or timber units. Nothing starts on site until the lantern is physically in stock, so the roof is never opened waiting on a delivery.
- Access. Scaffold or a tower goes up, usually the working day before. On most single-storey extension work a tower and a properly edge-protected working platform is enough. On two-storey or awkward access, full scaffold.
- Strip and structural opening. On a new opening, the covering comes off, the deck is cut, and the trimmers or ring beam go in to the engineer’s detail. On a replacement, the old lantern is lifted off and the existing kerb is exposed and inspected. This is where any bad news surfaces, and we photograph it and show you.
- Kerb. The insulated kerb is built or rebuilt to a minimum 150mm above the finished roof at its lowest point, 200mm on exposed coastal sites, with insulation continuous with the roof insulation.
- Weathering in. The roof covering is dressed up the full kerb height and over the top edge, laps mechanically terminated. The roof is watertight at the end of this stage, with or without the lantern on it. This is the point we work towards on day one, every time.
- Lantern set and levelled. The eaves beam is bedded and fixed to the kerb with 316L fixings, the frame squared and levelled, then the ridge and rafters assembled.
- Glazing. Units are lifted in, gasketed and capped. On anything over about 2.5m we use a glass lifter or additional labour rather than improvising.
- Internal finish. Reveals formed, plasterboard and skim where that is in scope, trims fitted. Plaster drying time is on your programme, not ours.
- Water test and handover. We hose test the completed installation, walk you round the detail rather than just the finished look, and hand over the guarantee documentation and glazing specification in writing.
On a straight like-for-like replacement with a sound kerb, stages 3 through 9 are a two-day job: scaffold and strip Monday morning, watertight by Monday afternoon, glazed and finished Tuesday. A new opening with structural work is three to four days on site, plus whatever the engineer and Building Control need beforehand.


What a roof lantern costs
No other installer in Suffolk publishes these figures. We do, because the alternative is three quotes with no common basis and a homeowner guessing which one has left something out.
The ranges below are supply-and-fit for a thermally broken aluminium lantern with solar control double glazing, a new insulated kerb, all fixings, weathering and internal trims, on a single-storey extension with reasonable access, in the Ipswich and Suffolk area. They assume the roof structure is sound and no ring beam upgrade is needed.
| Lantern size (kerb dimension) | Typical supply and fit | Days on site | Workmanship guarantee |
|---|---|---|---|
| 1.0 x 1.0m | £2,400 to £3,200 | 1 to 2 | 10 years |
| 1.5 x 1.0m | £2,900 to £3,800 | 2 | 10 years |
| 2.0 x 1.0m | £3,400 to £4,400 | 2 | 10 years |
| 2.5 x 1.5m | £4,600 to £6,000 | 2 to 3 | 10 years |
| 3.0 x 2.0m | £6,200 to £8,400 | 3 to 4 | 10 years |
Things that move the figure, up or down:
- Timber frame instead of aluminium: add 40 to 70 per cent.
- Triple glazing: add roughly 15 to 25 per cent on the unit cost.
- Marine-specification coating and 316L fixings throughout: add a modest percentage, and it is included as standard on any job within a mile of open sea.
- Electric opening vent: add £600 to £1,100 fitted, depending on system and whether power is already nearby.
- Dual-colour finish: add £250 to £500.
- Ring beam or structural upgrade: quoted separately once we have the engineer’s design. This is the single biggest variable on retrofit work.
- Scaffold on two-storey or restricted access: quoted separately.
- Conservation-style timber unit for a listed property: quoted individually, always.
The survey confirms the exact figure, and that figure is then fixed. The table above is a genuine range, not a teaser. Once we have surveyed your roof you get one written price, and that is what you pay. No mid-job discoveries, because the discovering happens at survey. Full price ranges across every service are on our costs page.

Where we work
We cover Ipswich, Suffolk and north Essex, roughly 30 miles out. That takes in the coastal belt at Felixstowe, Harwich and Frinton where full marine specification applies, the estuarine towns including Woodbridge, Wivenhoe and Manningtree where upgraded fixings are sensible without full marine treatment, and inland towns such as Colchester, Stowmarket and Hadleigh where the constraints are structural and conservation-related rather than corrosive.
Roof lanterns are one of nine services we offer. The full list, including flat rooflights, replacements and commercial work, is on our services page.
Common questions about roof lantern installation
How long will my roof be open during a roof lantern installation?
On a like-for-like replacement with a sound kerb, the roof is open for a matter of hours. We strip in the morning and the kerb is weathered in and watertight by the same afternoon. The lantern itself goes on the following day. On a new opening with structural work the roof is open longer, usually most of the first day, but we never leave a roof open overnight. If weather makes that impossible we sheet and secure and come back, rather than pressing on and hoping.
Do I need planning permission for a roof lantern?
Usually not, if the lantern is on a rear extension that itself has permission or falls under permitted development. Retrofitting a lantern onto an existing roof is more likely to need attention, because permitted development for roof alterations generally allows only 150mm of projection above the roof plane and a lantern exceeds that. Listed buildings always need listed building consent. Conservation areas and Article 4 areas need checking with the council before you order anything. We flag which category your property is in at survey.
Can my existing flat roof take a roof lantern?
Sometimes yes, often not without work. Cutting an opening removes joists and the load has to be transferred into trimmers or a ring beam. Openings up to about 1.2m across are usually manageable with doubled trimmers. Anything above 1.5m, and any retrofit into an existing roof, should have a structural engineer’s calculation. We survey the structure before quoting and tell you if an engineer is needed. We do not design structure ourselves.
What is the difference between a roof lantern and a flat rooflight?
A lantern is a pitched glazed structure standing 300mm to 600mm above the roof, with a ridge and glazing bars. A flat rooflight is a single sealed unit sitting nearly flush, adding perhaps 100mm to 150mm. Lanterns cost 30 to 50 per cent more for the same footprint, distribute light better across the day, shed rain and debris properly, and make more of a statement from the garden. Flat rooflights suit narrow side returns and tighter budgets. We fit both and we will tell you which one your room actually wants.
My roof lantern is misting and leaking. Can you repair it?
No. We do not offer repairs, resealing or patching on any rooflight. A reseal on a failed lantern typically buys twelve to eighteen months and does not touch the failed sealed units, the perished gaskets or the wet timber in the kerb, which is normally the real problem by the time water shows inside. We replace, and we rebuild the kerb where it needs rebuilding, which is the intervention that actually ends the leak. It is more expensive on the day and cheaper over any sensible timeframe.
What U-value should a roof lantern have?
Current Part L requires replacement rooflights in existing dwellings to achieve a whole-unit U-value of 2.2 W/m²K or better. That is a legal floor, not a target. A good thermally broken aluminium lantern with argon-filled double glazing and a warm-edge spacer achieves 1.2 to 1.4. Triple glazing gets you to roughly 0.9 to 1.1 at the cost of significant extra weight. We quote the actual figure for the unit you are buying so you can compare quotes properly.
Will a south-facing roof lantern make the room too hot?
It will if it is specified with clear glass. A lantern faces the sky and takes more solar gain per square metre than any window in the house. For south and west facing lanterns we specify a solar control coating with a g-value between 0.28 and 0.38, which cuts solar heat to around a third while keeping light transmission above 60 per cent so the room still reads bright. On larger lanterns an electric opening vent at the ridge gives hot air somewhere to go and is far easier to fit at the outset than later.
Why do you specify different fixings for coastal properties?
Chloride from salt-laden air attacks standard fixings. A grade 304 stainless screw within a mile of open sea at Felixstowe or Aldeburgh will commonly show rust staining down the frame within two or three winters. We use 316L stainless throughout on coastal work, because the molybdenum content resists chloride pitting, along with a marine-specification powder coating, taller kerbs and isolation between dissimilar metals. Estuarine locations like Woodbridge and Manningtree carry moderate salt loading rather than open-sea exposure, and we specify accordingly rather than overselling.
Get a fixed price for your roof lantern
Send us the room dimensions, whether it is a new extension or a replacement, and roughly where the property sits. We will come and survey it, check the structure, check the fall, and give you one written price with the glazing specification and U-value stated on it. That price is fixed. Every installation carries a 10-year workmanship guarantee, and the installers doing the work have 25 years fitting rooflights behind them.
Request a fixed quote for roof lantern installation in Ipswich, Suffolk or north Essex, or look at our published prices across every service first if you are still working out the budget.

In this section
Condensation on Roof Lanterns: Causes and Permanent Fixes
Read moreLeaking Roof Lantern: Diagnosing Where the Water Really Gets In
Read moreMisted and Blown Glazing in a Roof Lantern
Read moreWhen a Roof Lantern Upstand Is the Problem, Not the Lantern
Read moreRooms That Overheat Under a Roof Lantern
Read moreAluminium Roof Lantern Installation
Read moreTimber Roof Lanterns for Period and Listed Properties
Read moreLarge-Span and Multi-Section Roof Lanterns
Read moreHow a Roof Lantern Upstand Is Built
Read moreThe Roof Lantern Installation Process, Stage by Stage
Read moreRoof Lantern Installation Costs in Suffolk
Read moreRoof Lantern or Flat Rooflight: Which Suits Your Extension
Read moreHow Is a Roof Lantern Fitted to a Flat Roof?
Read moreHow Long Does Roof Lantern Installation Take?
Read moreHow Do You Choose Glazing for a Roof Lantern?
Read moreHow Big Should a Roof Lantern Be for the Room?
Read moreWhat Is a Roof Lantern Upstand?
Read moreWhat U-Value Does a Roof Lantern Need?
Read moreWhat Fall Does the Roof Around a Lantern Need?
Read moreDo You Need Planning Permission for a Roof Lantern?
Read moreWhy Do Roof Lanterns Leak at the Corners?
Read moreWhy Do Roof Lanterns Corrode Near the Coast?
Read moreShould You Reseal or Replace a Failing Roof Lantern?
Read moreWhen Should a Roof Lantern Be Replaced?
Read moreWhat Time of Year Is Best for Fitting a Roof Lantern?
Read moreHow Much Does a 3m x 2m Roof Lantern Cost Fitted?
Read moreHow Much Does It Cost to Replace an Existing Roof Lantern?
Read moreIs an Aluminium Roof Lantern Cheaper Than Timber?
Read moreRoof Lantern or Frameless Glass Box: Which Is Right?
Read moreTraditional or Contemporary Roof Lantern?
Read moreRoof Lantern Leaking in Heavy Rain: What to Do Now
Read moreCracked Roof Lantern Glass: Is It Safe?
Read moreThinking about this job? We survey across Ipswich, Suffolk and north Essex and give you a fixed price before any work starts, with a 10-year workmanship guarantee.