Pitched Roof Skylight Installation
- Fixed quote before we start
- Roof never left open overnight
- 10-year workmanship guarantee

- Fixed quote before we start
- 10 years workmanship guarantee
- 25 years fitting rooflights
- Skylights only, not a general roofer
A rooflight in a pitched roof is the job that looks simplest from the ground and has the most hidden detail in it. Cut the tiles back, drop the window in, clip the flashing on, done by lunchtime. That is genuinely how a lot of them are fitted, and it is why so many of them leak at the head, drip condensation down the reveal in January, or sit slightly proud of the tile line with a shadow gap you can see from the garden.
The work that decides whether a pitched rooflight lasts twenty years happens in about forty minutes of the installation, and none of it is visible afterwards. Trimming the rafters properly and squaring the opening. Dressing the underfelt into a collar so anything that gets past the tiles is carried back out over the covering. Fitting an insulation collar around the frame so the perimeter is not a cold bridge. Setting the frame at the right depth in the roof so the flashing kit sits down onto the tiles instead of bridging them.
Pitched roof skylight installation in Ipswich covers a broad range of roofs. Victorian and Edwardian slate and plain tile across the town centre and the Norwich Road terraces. Interlocking concrete on the 1960s to 1980s estates at Chantry, Rushmere and Kesgrave. Suffolk pantiles across the villages, which behave differently to everything else. Trussed modern roofs on the new-build growth at Grange Farm, Sproughton and Martlesham. Each one needs a different flashing kit, and getting that wrong is not something you can correct later without taking the unit out.
Where pitched rooflights actually leak
Pitched roofs are good at shedding water, which means a rooflight in one leaks for different reasons than a flat roof rooflight does. There is no ponding. There is no standing water. What there is instead is a huge volume of water arriving from above and being asked to part cleanly around an obstruction, then rejoin below it.
The failures we get called to, in order of how often we see them:
- The head flashing is bridging the tiles rather than sitting on them. If the frame is set too high in the roof, the top flashing spans across the tile above rather than being dressed down into its profile. Water runs under it. This is the number one cause and it is a setting-out error, not a product fault.
- No underfelt collar. The membrane below the tiles was cut for the opening and left cut, so any water that gets past the tiles, and some always does, runs straight to the timber instead of being carried back out over the felt below the window.
- Wrong flashing kit for the covering. A flat-profile kit fitted to pantiles, or a deep-profile kit fitted to slate, leaves gaps that no amount of mortar will close permanently.
- Side soakers omitted or short. The vertical sides of the opening are the hardest part and the easiest to skimp. Short soakers work for two years.
- Mortar used as a waterproofing material. Mortar around a rooflight will crack. It is a bedding and a finish, never the weathering.
- The unit is the wrong depth in the roof for the covering. Every manufacturer specifies a fitting depth relative to the tile batten. Ignore it and the flashing geometry is wrong from the start.
Notice that five of those six are installation errors and only one is a product problem. That is the honest picture of this trade. The windows themselves, from VELUX, Keylite, Roto and Fakro, are good products, and we have 25 years of fitting them behind us. The variable is who put it in.
And the failure that is not a leak at all
The most common call we take about a pitched rooflight in winter is water running down the internal reveal, and most of the time it is condensation from a missing insulation collar rather than a leak. It has a signature: it appears in cold weather, is worst in the morning, forms evenly around all four reveals, and happens whether it has rained or not. A leak follows rain, comes from one edge or corner, and stains brown. We cover the collar detail properly further down, because it is the single most skipped part of this job.

Cutting and trimming the rafters
Every pitched rooflight starts with an opening in the roof structure, and the structure is a set of rafters spanning from wall plate to ridge. Cut one and its load has to go somewhere.
Rafter spacing decides your window size
This is the constraint that surprises people most. Rooflight widths are not arbitrary, they are built around common rafter spacings. Most UK roofs have rafters at 400mm or 600mm centres. The standard rooflight widths of 550mm, 660mm, 780mm, 940mm and 1140mm exist because they fit between, or across, those centres with sensible trimming.
- A 550mm unit will often drop between rafters at 600mm centres with no rafter cut at all. That is the cheapest, quickest, least invasive installation available and on a loft where you just want daylight it is worth considering seriously.
- A 780mm unit into 600mm centres means cutting one rafter and trimming.
- A 1140mm unit into 600mm centres means cutting one, sometimes two rafters depending on where it lands.
- Anything above about 1340mm wide, or two rafters cut, needs a structural check rather than a standard trimming detail.
At survey we measure the actual rafter positions from inside the loft before recommending a size, because a window that suits the room and lands badly on the rafters costs more to fit than one 100mm narrower that lands well. We will show you both options and the price difference.
Trimmers and headers
The standard detail is a trimmer, sometimes called a header, fixed horizontally across the top and bottom of the opening between the two rafters that remain either side. The cut rafter is then supported off those trimmers. The trimmers must be the same depth as the rafters, fixed into the full depth of the retained rafters, and fixed before the rafter is cut through. Not after.
Where a single rafter is cut in a normal domestic roof, a trimmer of matching section either side is standard practice and does not usually need an engineer. Where any of the following apply, we want a structural engineer’s calculation:
- Two or more rafters are being cut.
- The roof is a trussed rafter roof. Trusses are engineered as complete units and must never be cut without a structural design. This applies to most housing built after about 1970, including all the new-build stock at Grange Farm, Sproughton, Martlesham and Kesgrave. It is not a grey area.
- The opening lands near a valley, a hip, or within about 600mm of the ridge or eaves.
- The roof is timber-framed, historic, or has been altered previously, which is common across inland Suffolk villages and where rafter sizes and spans are frequently irregular.
- The rooflight is part of a loft conversion, in which case the whole roof structure is being designed anyway and the openings are part of that design.
An engineer’s calculation on a domestic opening runs to a few hundred pounds. It is the cheapest insurance on the job and Building Control will normally want it. We build to the engineer’s design. We do not design structure and we will not pretend to.
Squaring the opening
The opening has to be square, and on an old Suffolk roof that is not a given. Rafters bow, ridges sag, and a roof that has been on for 130 years has settled. A rooflight frame set into an out-of-square opening will not close evenly, the sash will bind on one corner, and the flashing will sit unevenly on the tiles. We pack and true the opening to the frame rather than forcing the frame into whatever the roof offers. It takes an extra half hour and it is the difference between a window that opens smoothly in year ten and one that does not.

Flashing kits: matching the kit to the covering
The flashing kit is the assembly of preformed metal sections that weathers the join between the rooflight frame and the roof covering. It is supplied by the window manufacturer, it comes in different profiles for different covering types, and choosing the wrong one is the mistake that cannot be corrected without pulling the unit out.
The kit has four parts, and each does a distinct job:
- The apron or bottom flashing, which sits below the window and is dressed down over the tiles or slates in the course beneath, throwing water clear onto the covering.
- The side sections and soakers, interleaved with each course of tile or slate up the sides of the opening, so that each course discharges onto the one below without water ever reaching the frame.
- The head flashing, which sits under the tiles or slates above the window and is dressed down into their profile. Water arriving from above runs over it and is deflected around the window.
- The drainage gutter behind the head flashing on most modern systems, which collects anything that does get behind and discharges it out to the sides.
By covering type
Slate and other flat coverings. Natural slate, fibre cement slate, flat concrete tile and shingles all take a flat-profile kit. The metalwork sits down almost directly onto the covering and the side soakers are relatively short, because the coverings are thin and flat. This is the easiest kit to get right and the neatest looking finish, with the flashing almost invisible from the ground. On Victorian slate roofs across central Ipswich this is the standard.
Plain tile. Small clay or concrete plain tiles are flat but thicker than slate and laid double-lapped, so the kit sits slightly higher and the soakers are longer. Plain tile roofs are also the most forgiving of a slightly out-of-true opening, because you can adjust course by course.
Interlocking concrete tile. The standard covering on 1960s to 1980s estates and on most modern housing. These are profiled with a raised interlock rib along one edge, so the kit needs a deeper section to bridge that rib without leaving a gap. This is where the low-profile versus high-profile kit choice starts to matter. A tile with a profile depth up to about 45mm takes the standard kit. Beyond that you need the deep version.
Pantiles and deep-profile clay. Suffolk is pantile country and this is where the most gets got wrong. A traditional clay pantile has a deep S-curve, often 50mm or more of profile depth, and it is laid single-lap. A flat kit fitted to pantiles leaves a void under every roll that is either left open or filled with mortar, and the mortar cracks within three winters. The correct answer is a high-profile flashing kit designed for deep coverings, with the apron pressed to a profile depth that lets it sit down into the trough of the tile. On genuinely irregular handmade Suffolk pantiles we sometimes go further and use lead soakers dressed individually to the tile profile, which is slower and costs more and is the only detail that actually works on those roofs.
Combination and mixed roofs. Where a rooflight sits at a change of covering, or where an old roof has been patched with a different tile, the kit gets combined or lead is dressed in. These are survey decisions, not catalogue decisions.
| Covering | Typical profile depth | Flashing kit | Soaker detail | Where it goes wrong |
|---|---|---|---|---|
| Natural or fibre cement slate | Flat, under 10mm | Flat-profile kit | Short soakers, interleaved each course | Slates cut too tight to the frame, no side clearance |
| Clay or concrete plain tile | Flat, 12 to 15mm | Flat-profile kit | Longer soakers, double lap maintained | Head flashing set too high in the roof |
| Interlocking concrete tile | Up to 45mm | Standard profiled kit | Soakers dressed over the interlock rib | Deep tile fitted with a flat kit, gap at the rib |
| Clay pantile and deep-profile | 45 to 60mm plus | High-profile kit, deep-pressed apron | Apron dressed into the trough of the tile | Voids under the rolls filled with mortar. Cracks in three winters |
| Handmade or irregular Suffolk pantile | Variable, often 60mm plus | High-profile kit plus individually dressed lead | Lead soakers formed to each tile | Any attempt to use a standard kit straight from the box |
| Conservation rooflight in slate or plain tile | Flat | Dressed lead throughout, no proprietary kit visible | Lead soakers, code 4 minimum | Visible aluminium flashing on a listed or conservation roof |
Profile depths are typical. Your survey confirms the actual covering and the kit that suits it, and that kit is included in the fixed price.

The two collars cheap fitters skip
If you take one thing from this page, take this section. These two details cost very little in materials, they take under an hour between them, they are completely invisible once the job is finished, and their absence is the reason a large share of pitched rooflights disappoint their owners.
The underfelt collar
Below the tiles and battens there is a membrane, either a modern breathable underlay or, on older roofs, bituminous felt. It is the second line of defence. Some water always gets past a tiled roof in driving rain, and the underlay carries it down to the gutter.
When an opening is cut for a rooflight, the underlay gets cut too. Done properly, the membrane is cut in a specific pattern, dressed into the opening, and formed into a collar that is taken up the outside of the rooflight frame and secured, with the section below the window dressed out over the underlay of the course below so water is discharged back onto the drainage plane. Manufacturers supply a preformed underfelt collar with most windows for exactly this purpose, and it takes about twenty minutes to fit.
Done badly, the membrane is slashed with a knife to make the hole and left flapping. Everything that gets past the tiles then arrives directly on the trimmers and the top of the plasterboard. That water may take three or four years to show, by which point the timber around the opening is wet and the cause is not obvious.
We fit the underfelt collar on every single installation. It is not an extra.
The insulation collar
The second one is the thermal detail. A rooflight frame is set into a roof that is insulated between and often under the rafters. The frame itself sits in a gap in that insulation, and unless the gap is filled, there is a continuous cold void running right around the perimeter of your new window.
The result is a cold line around the frame. In cold weather the internal reveals sit below the room’s dew point, moisture in the air condenses on them, and water runs down the plasterboard. The homeowner sees water and calls it a leak. It is not a leak, and no installer chasing it on the outside will ever find anything.
Manufacturers supply a preformed insulation collar, usually a moulded EPS or foam surround, that wraps the frame and closes that void. Alternatively it can be detailed with rigid insulation cut and fitted tight around the frame with the vapour control layer sealed to the frame on the warm side. Either method works. Leaving the void open does not.
The vapour control layer matters as much as the insulation. Warm moist air pushing into the roof build-up around an unsealed frame condenses inside the construction where you cannot see it. Sealing the vapour layer to the frame with the manufacturer’s tape stops that, and it takes ten minutes.
And while the reveals are open
Splay the internal reveals. A reveal cut back at an angle rather than square, typically vertical at the head and horizontal at the sill, lets warm room air wash across the plasterboard instead of stagnating in a cold shaft, and it throws noticeably more daylight into the room for the same opening. It is the standard detail on any decent loft conversion and it costs very little extra at first fix.
Why this matters when you compare quotes. An underfelt collar, an insulation collar and a taped vapour seal add perhaps an hour of labour and a modest materials cost. They are also completely invisible on handover day. That is exactly why they get left out of a cheap price, and exactly why we itemise them. If a quote you are comparing does not mention them, ask.


Loft conversions: daylight and fire escape
A large share of pitched rooflight work is loft conversions, and there are two separate regulatory drivers that people conflate.
Daylight, Part L and the 20 per cent rule of thumb
There is no single legal minimum glazing area for a habitable loft room in England in the way people often assume. What there is instead is a widely used design guide of a glazed area equal to roughly 20 per cent of the floor area for a room that is going to feel properly lit, and a Part L requirement that the glazing you install performs thermally.
In a loft, the practical guidance we give is:
- A room up to about 10m² is usually well served by one 780 x 1400mm unit, or two smaller ones if the rafter positions suit.
- Above about 14m², two units placed apart from each other beat one large one, because two light sources from different points remove the shadowing you get from a single opening.
- Position the sill so that the bottom of the glass is between 800mm and 1100mm above the finished floor. That gives a view out when seated and puts the handle within reach. Too high and it is a light well; too low and it is a hazard.
- The top of the window ideally reaches around 2m above floor level, because the height of the head is what determines how far light penetrates into the room.
- On a shallow pitch, choose a taller unit. The shallower the roof, the more of a window’s height you need to get light and view.
Part B fire egress
This one is not a guideline, it is a requirement, and it is regularly missed on unregulated conversions.
A habitable room in a loft conversion generally needs an escape route. Where the conversion is a single storey above the ground floor and a protected stairway route is not being provided, an escape window is required. The rooflight then has to meet specific dimensions: a clear openable area of at least 0.33m², with a minimum clear opening of 450mm in both height and width, and the bottom of that openable area no more than 1100mm above the floor of the room.
Not every rooflight meets that. A centre pivot unit that rotates on its middle axis has an obstruction across the middle of the opening when it is open, so it usually cannot serve as an escape window unless it has a specific escape function that lets the sash swing clear. Top-hung and side-hung escape units are made specifically for this, and they are ordered as escape units rather than converted later.
The other trap is size. A 550 x 780mm unit does not achieve 0.33m² of clear opening. If a room needs an escape window, that constrains the size before anything else does. We check this at survey and we will tell you if the window you wanted cannot legally serve the room you are creating. Building Control will check it on inspection regardless, and finding out then is expensive.
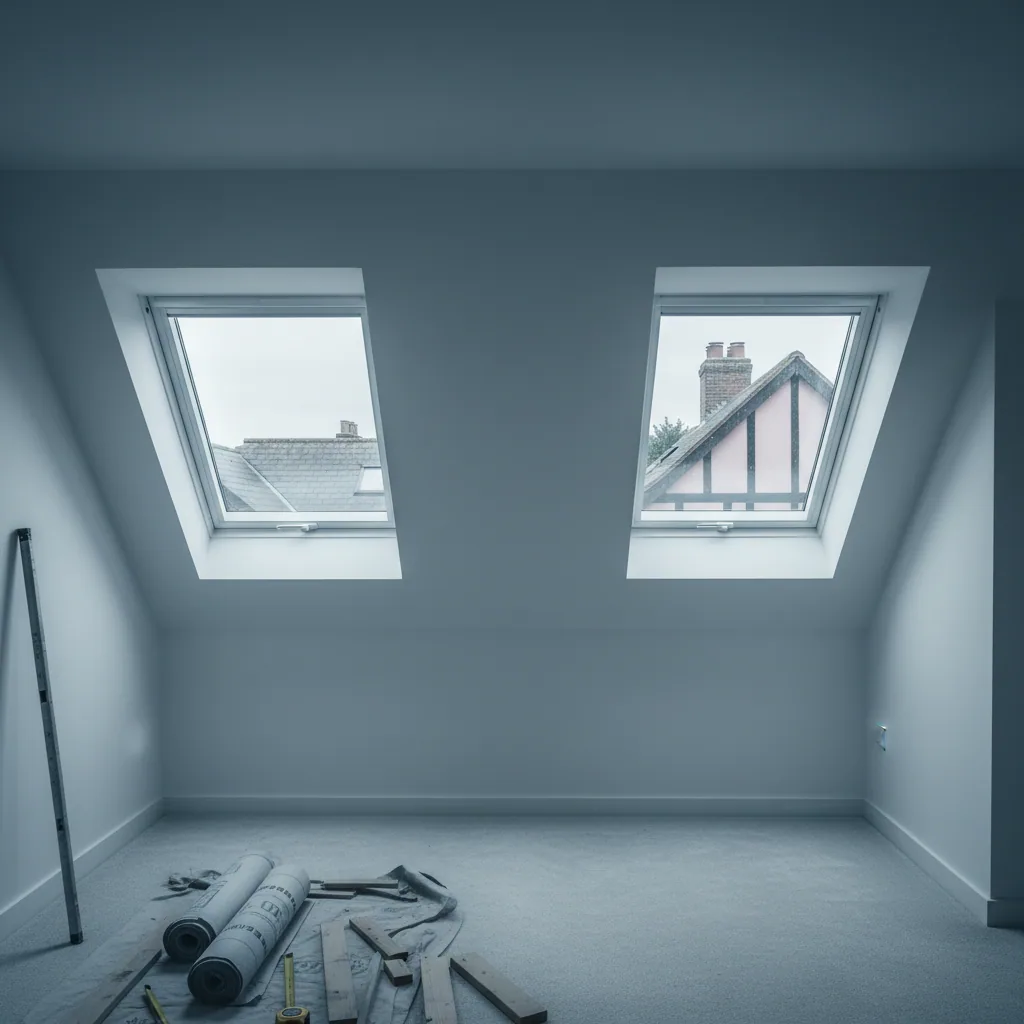
Conservation rooflights for Suffolk’s listed and conservation stock
Suffolk and north Essex carry an unusually high density of conservation areas and listed buildings. Lavenham, Aldeburgh, Southwold, Dedham, Coggeshall, Clare, Kersey and a substantial part of central Ipswich are all constrained, and Article 4 directions in some areas remove permitted development rights that would otherwise apply. This is genuinely common work here in a way it is not in most of the country.
What makes a rooflight a conservation rooflight
A conservation rooflight is designed to look like the cast iron rooflights fitted to Victorian and Edwardian buildings, and the design rules are quite specific:
- It sits flush with the roof plane, or very nearly. A standard modern unit stands proud by 40mm or more. A conservation unit is set down into the roof so the glass is close to level with the tile or slate surface.
- The frame is slim and dark, usually black or a very dark grey, so it reads as a shadow rather than a border.
- There is a central vertical glazing bar on most patterns, splitting the light into two panes, which is the single most recognisable feature of the original ironwork.
- The proportions are tall and narrow, closer to a 1:2 ratio than the squarer proportions of modern units.
- The flashing is dressed lead, code 4 or heavier, rather than a visible proprietary aluminium kit.
Consent
The practical position:
- On a listed building, listed building consent is required for a rooflight regardless of where it goes, including on a rear slope not visible from anywhere. There is no permitted development route and the penalties for proceeding without it are criminal rather than civil.
- In a conservation area, a rooflight on a rear slope not visible from a public highway is often acceptable. Anything on a front or visible slope will usually need a conservation pattern unit, and sometimes will be refused regardless.
- Under an Article 4 direction, permitted development rights you would normally rely on may have been withdrawn. Check before you order.
- Standard permitted development for roof alterations generally allows a rooflight projecting no more than 150mm above the plane of the existing roof and not sitting above the highest part of the roof. Most standard pitched rooflights sit inside that, which is why planning is usually straightforward outside of designated areas.
Talk to the conservation officer at Ipswich Borough, East Suffolk, Mid Suffolk, Babergh or Colchester before you order anything. They are generally helpful, and an early conversation is a great deal cheaper than a refused application with a window already on site. Where a unit needs to be genuinely non-standard in size or pattern to satisfy a conservation officer, our custom skylight design service covers made-to-survey units.
Timber-framed and thatched buildings
Suffolk has a lot of timber-framed stock, and the structural approach is different. Historic roofs frequently have irregular rafter sizes, spacings that vary across the same slope, and members that have been spliced or replaced over centuries. Standard trimming details assume regular modern timber. On a historic roof, we survey the actual structure from inside, and structural work goes to an engineer with conservation experience rather than being assumed. Thatched roofs are a specialist case and generally not rooflight territory at all, and we will say so rather than take the job.
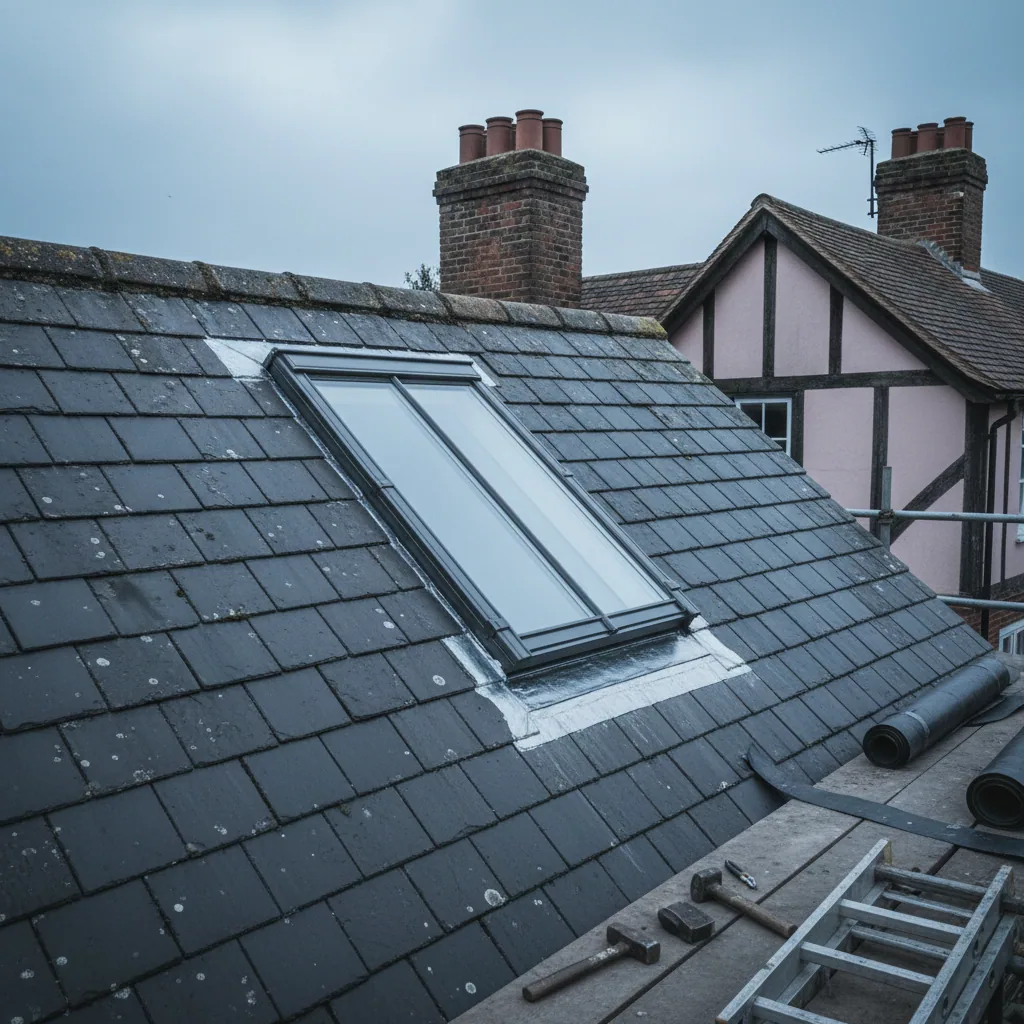
Pitch limits, and centre pivot versus top hung
Minimum and maximum pitch
Rooflights are certified for a range of roof pitches and the range is narrower than people expect. Most standard centre pivot and top hung units are rated for roofs between 15 and 90 degrees. Below 15 degrees the water does not clear the flashing reliably, and the manufacturer’s warranty will not apply.
Between about 10 and 15 degrees, some manufacturers offer a low-pitch installation kit which raises the unit slightly and modifies the drainage geometry to make it work. Below 10 degrees you are into flat roof territory and the right product is a flat rooflight on an upstand rather than a pitched unit, which we cover on our flat roof skylight installation page.
A lot of 1960s and 1970s houses locally have shallow pitches around 17 to 22 degrees, which is inside the range but at the low end. On those roofs the flashing detail has to be exact, because there is less gravity doing the work for you.
Centre pivot
The sash rotates on pivots at its mid height. The advantages are practical: the handle is at the top of the sash so you can reach it from standing even in a high-set window, it rotates fully for cleaning the outer face from inside, and it is the cheapest and most widely stocked option.
The disadvantages are that the open sash intrudes into the room at head height, which matters in a low loft where you will walk into it, and the pivot bar across the middle of the opening means most centre pivot units cannot serve as a Part B escape window.
Top hung
The sash hinges at the top and swings outward, leaving the whole opening clear. That gives an unobstructed view when open, no sash intruding into the room, and it is what an escape unit needs to be. Handles are at the bottom of the sash, so the window needs to be within comfortable reach or you need a control rod.
Most modern top hung units also have a secondary centre pivot function for cleaning, so you get both. They cost more than a plain centre pivot, typically 15 to 30 per cent on the unit.
Which to choose
- High-set window in a loft, purely for daylight: centre pivot.
- Any room needing Part B escape: top hung escape unit, no alternative.
- Low headroom where you would walk into an open sash: top hung.
- Sill at 900mm to 1100mm with a view you actually want: top hung, every time. The unobstructed opening is worth the extra.
- Hard to reach and you want it powered: either, with an electric actuator and rain sensor. Wiring goes in before the reveals are boarded, which is covered on our electric skylight installation page.
We fit VELUX, Keylite and Roto units and we have no incentive to steer you to one brand. What matters far more than the badge is the flashing kit being right for your covering and the collars being fitted. Our VELUX window installation page goes into the specific ranges, sizing codes and glazing options in more depth.
East-facing slopes and coastal exposure
On the Suffolk and north Essex coast, orientation matters more than it does inland, and it matters most on pitched roofs.
Weather here arrives predominantly from the east and north-east off the North Sea, and it arrives with salt in it. An east or north-east facing roof slope at Felixstowe, Harwich, Frinton, Aldeburgh or Southwold takes wind-driven rain almost square on. The water is not falling onto that slope, it is being pushed at it, and it will find any lap in the flashing that relies on gravity rather than on geometry and mechanical fixing.
What we change on exposed coastal slopes:
- 316L stainless fixings throughout. Not A2 grade 304. The molybdenum content in 316L resists chloride pitting. A 304 fixing within a mile of open sea will show rust staining within two or three winters, and on a pitched roof that staining runs visibly down the tiles below the window.
- Marine-specification finish on external frame components where the manufacturer offers it, which most do as an upgrade rather than as standard.
- Increased flashing laps and mechanical fixing at the head, rather than relying on the standard lap dimension designed for inland gravity drainage.
- Lead rather than aluminium at the apron on the most exposed slopes, because dressed lead can be formed tighter to an irregular covering than a pressed section can.
- Underlay lapped further at the collar, because on an exposed slope more water gets past the tiles than the underlay was designed for.
- Isolation between dissimilar metals. Aluminium against steel in a chloride environment sets up galvanic corrosion.
Estuarine locations are treated differently and we are deliberate about that. Woodbridge, Wivenhoe, Manningtree, Shotley and Pin Mill sit on tidal saline water with real wind exposure across open water, but they do not carry open-sea salt loading. Upgraded fixings are sensible there. Full marine specification generally is not, and we are not going to sell it as though Woodbridge faced the North Sea. Inland at Stowmarket, Needham Market, Hadleigh and across mid Suffolk, corrosion is not a factor at all and the real constraints are conservation consent and irregular historic roof structure. See our Felixstowe page for what a full coastal specification looks like in practice.

How we fit it, stage by stage
The question people ask most is how long the roof is open. On a single pitched rooflight it is a matter of hours, and it is never overnight.
- Survey and fixed quote. We get into the loft and measure the actual rafter positions, sizes and spacing. We identify the covering and its profile depth so the correct flashing kit is ordered. We check the pitch, the orientation, the underlay type and condition, whether the roof is trussed or cut, and whether the room has a Part B escape requirement. You get one written fixed price with the unit, the flashing kit and the collars itemised.
- Order and lead time. Standard sizes in common finishes are typically one to two weeks. Escape units, conservation patterns, triple glazing, electric openers, deep-profile flashing kits and made-to-size units run longer. Nothing starts on site until everything, including the correct flashing kit, is physically in stock.
- Access and protection. Scaffold or tower with edge protection, up the working day before. Inside, the loft or room below is sheeted and the floor protected before anything is cut. Old roofs produce a remarkable amount of dust.
- Set out and strip. The opening is marked from inside against the rafters, checked against the flashing kit’s required dimensions, then tiles or slates are lifted back from the outside in whole courses and stacked for reuse. We do not snap tiles off. Broken tiles get replaced with matching salvage where we can get it, and on Suffolk pantiles that sometimes means sourcing reclaimed.
- Trimming. Trimmers are fixed top and bottom between the retained rafters, props go in below where the span calls for it, and only then is the rafter cut through. The opening is squared and packed true to the frame dimensions.
- Underfelt collar. The underlay is cut to pattern, dressed into the opening, formed into a collar and taken up the outside of the frame position, with the lower section dressed out over the underlay below so water discharges back onto the drainage plane.
- Frame set. The frame goes in on its brackets, set at the depth the manufacturer specifies relative to the tile batten for that covering. This dimension is what makes the flashing geometry work. It is checked for square and for level across both diagonals before anything is fixed permanently.
- Flashing. Apron dressed down over the course below. Side sections and soakers interleaved course by course as the covering is re-laid up the sides. Head flashing under the course above and dressed down into its profile. Tiles or slates cut to fit around the metalwork rather than the metalwork forced to fit the tiles. The roof is watertight at the end of this stage.
- Insulation collar and vapour seal. Preformed collar or cut rigid insulation fitted tight around the frame, closing the void, with the vapour control layer taped to the frame on the warm side.
- Sash hung and adjusted. Sash fitted, hinges and friction adjusted, closing pressure set even across all four sides, ventilation flap and any blind fixings checked.
- Internal finish. Reveals formed and splayed, plasterboard and skim where that is in scope, trims fitted. Plaster drying time is on your programme, not ours.
- Water test and handover. We hose test the completed installation from above, walk you round the flashing detail rather than only the finished look, and hand over the guarantee documentation with the glazing specification and U-value stated in writing.
A single rooflight into an existing pitched roof with one rafter cut is generally a one to two day job. Scaffold and strip in the morning, trimmed, collared and weathered in by mid-afternoon, internal finishing the following day. Two or three units on the same slope run to two or three days. A full loft conversion glazing package is programmed around the conversion works and the structural design that comes with it.

What pitched roof skylight installation costs
No other installer in Suffolk publishes these figures. We do, because the alternative is three quotes with no common basis and a homeowner guessing which one has left the collars out.
The ranges below are supply and fit for a double glazed rooflight from VELUX, Keylite or Roto with the correct flashing kit for your covering, underfelt collar, insulation collar, vapour seal, trimming of one rafter where needed and internal trims, on a two-storey domestic roof with reasonable scaffold access in the Ipswich, Suffolk and north Essex area.
| Unit and job type | Typical supply and fit | Days on site | Workmanship guarantee |
|---|---|---|---|
| Like for like replacement of an existing unit, up to 780 x 1180mm | £1,250 to £1,850 | 1 | 10 years |
| New 550 x 980mm unit, no rafter cut | £1,450 to £2,000 | 1 | 10 years |
| New 780 x 1180mm centre pivot, one rafter trimmed | £1,900 to £2,650 | 1 to 2 | 10 years |
| New 780 x 1400mm top hung, one rafter trimmed | £2,250 to £3,100 | 1 to 2 | 10 years |
| New 1140 x 1180mm unit, one or two rafters trimmed | £2,600 to £3,600 | 2 | 10 years |
| Part B escape unit, top hung, to required clear opening | £2,400 to £3,300 | 1 to 2 | 10 years |
| Two units on the same slope, 780 x 1180mm each | £3,400 to £4,700 | 2 | 10 years |
| Conservation pattern unit with dressed lead flashing | £2,900 to £4,200 | 2 | 10 years |
| Electrically opening unit with rain sensor, 780 x 1180mm | £2,700 to £3,700 | 2 | 10 years |
What moves the figure, up or down:
- Deep-profile or handmade pantile flashing with dressed lead: add £250 to £600 per unit. Standard on genuinely irregular Suffolk pantile roofs, because a boxed kit will not weather them.
- Triple glazing: add roughly 15 to 25 per cent on the unit cost.
- Solar control or laminated safety inner pane upgrades: add £120 to £350 per unit.
- Marine-specification finish and 316L fixings throughout: included as standard within a mile of open sea, a modest addition elsewhere if you want it.
- Cutting a trussed roof: requires structural design first, and the structural work is quoted separately once we have the engineer’s drawing. Never assume a truss can be cut.
- Internal plastering and decoration: included where stated in your quote, excluded where another trade is doing it. It is itemised either way.
- Blinds, fitted at the time: £120 to £320 per unit depending on type, and cheaper fitted now than retrofitted.
- Scaffold on complex, tall or restricted access roofs: quoted separately.
- Listed building consent drawings and application support: quoted individually.
The survey confirms the exact figure, and that figure is then fixed. The table above is a genuine range, not a teaser. Once we have been up in your loft and on your roof you get one written price, and that is what you pay, because the discovering happens at survey rather than mid-job. Ranges across every service are on our costs page.

Where we work
We cover Ipswich, Suffolk and north Essex, roughly 30 miles out, and the pitched roof work varies a lot by area. Slate and plain tile on the Victorian and Edwardian terraces across central Ipswich, much of it in conservation areas. Interlocking concrete on the estate housing at Chantry, Rushmere and Kesgrave, which is the bulk of the straightforward loft conversion work. Clay pantile across the Suffolk villages, which needs the deep-profile kit and sometimes dressed lead. Trussed modern roofs on the new-build growth at Grange Farm, Sproughton, Martlesham and Great Blakenham, where nothing gets cut without a structural design. And the coastal belt at Felixstowe and Harwich, where east-facing slopes get the full marine specification.
Pitched rooflights are one of nine services we offer. The full list, including flat rooflights, roof lanterns and replacements, is on our services page, and if energy performance is the main driver for your project our energy efficient skylight installation page covers U-values and fabric interaction in more depth.
Common questions about pitched roof skylight installation
Can I fit a rooflight into a trussed roof?
Not without a structural design. Trussed rafters are engineered as complete triangulated units and cutting any member changes how the whole truss behaves. This applies to most housing built after about 1970, including all the new-build stock around Grange Farm, Sproughton, Martlesham and Kesgrave. The usual answer is either a narrow unit that drops between trusses without cutting anything, or a structural engineer’s design for trimming and supporting the cut truss. We check whether your roof is trussed or traditionally cut at survey, from inside the loft, before quoting.
What size rooflight fits my rafter spacing?
Standard widths of 550mm, 660mm, 780mm, 940mm and 1140mm exist because they work with rafters at 400mm or 600mm centres. A 550mm unit will often drop straight between rafters at 600mm centres with nothing cut at all, which is the quickest and cheapest installation available. A 780mm unit into 600mm centres means one rafter cut and trimmed. Anything above about 1340mm wide, or two rafters cut, needs a structural check. We measure your actual rafter positions from inside the loft before recommending a size, and we will show you the price difference between options.
What is an insulation collar and do I need one?
It is a preformed insulated surround that closes the void between the rooflight frame and the roof insulation, with the vapour control layer taped to the frame on the warm side. You need one. Without it there is a continuous cold bridge right around the perimeter of the window, the internal reveals sit below dew point in cold weather, and moisture condenses and runs down the plasterboard. Owners reasonably assume that is a leak, and no installer chasing it from outside will find anything. It takes under an hour to fit, it is invisible on handover day, and that is exactly why cheap quotes leave it out.
Does my loft rooflight need to be a fire escape window?
If the room is habitable and the conversion does not provide a protected stairway escape route, then generally yes. Part B requires an escape window with a clear openable area of at least 0.33m², a minimum clear opening of 450mm in both height and width, and the bottom of that opening no more than 1100mm above the floor. A standard centre pivot usually cannot serve as one, because the pivot bar obstructs the opening. You need a top hung or side hung escape unit, ordered as an escape unit. A 550 x 780mm window does not achieve the required area. We check this at survey.
What is the minimum roof pitch for a rooflight?
Most standard centre pivot and top hung units are certified between 15 and 90 degrees. Below 15 degrees water does not clear the flashing reliably and the manufacturer’s warranty will not apply. Between roughly 10 and 15 degrees some manufacturers offer a low-pitch kit that raises the unit and modifies the drainage geometry. Below 10 degrees you should be fitting a flat rooflight on an insulated upstand instead, which is a different product and a different detail. Plenty of 1960s and 1970s houses locally sit at 17 to 22 degrees, which works, but the flashing has to be exact.
Do I need planning permission for a rooflight in a conservation area?
Often, and always on a listed building. Standard permitted development for roof alterations allows a rooflight projecting no more than 150mm above the roof plane and not above the ridge, which most pitched units meet. In a conservation area a unit on a rear slope not visible from a public highway is frequently acceptable, while anything on a visible slope will usually need a conservation pattern unit sitting flush with a central glazing bar and dressed lead flashing. Article 4 directions can remove rights you would otherwise have. Speak to the conservation officer before ordering anything.
Why does the flashing kit depend on my roof covering?
Because the flashing has to sit down into the profile of the covering, not bridge across it. Slate and plain tile are flat and take a flat-profile kit. Interlocking concrete tile has a raised rib up to about 45mm and takes a standard profiled kit. Clay pantiles have a deep S-curve, often 50mm or more, and need a high-profile kit with a deep-pressed apron that reaches into the trough of the tile. Fit a flat kit to pantiles and you leave a void under every roll, which someone then fills with mortar, and that mortar cracks within three winters. On irregular handmade Suffolk pantiles we dress lead soakers individually instead.
Centre pivot or top hung, which should I choose?
Centre pivot is cheaper, has the handle at the top so a high-set window stays reachable, and rotates fully so you can clean the outside from inside. It suits a high window fitted purely for daylight. Top hung swings outward from a top hinge, leaves the whole opening clear, does not intrude into the room at head height and is what any Part B escape unit has to be. If the sill sits between 900mm and 1100mm and you actually want the view, or headroom is tight enough that you would walk into an open sash, choose top hung. Most modern top hung units also pivot for cleaning.
Get a fixed price for your pitched roof rooflight
Tell us roughly what the roof is covered with, whether it is a new opening or a replacement, what the room below is for, and where the property sits. We will come out, get into the loft to measure the actual rafters, check the pitch and the covering profile, and give you one written price with the unit, the flashing kit, the collars and the glazing specification itemised on it. That price is fixed. Every installation carries a 10-year workmanship guarantee, and the installers doing the work have 25 years fitting rooflights behind them.
Request a fixed quote for pitched roof skylight installation in Ipswich, Suffolk or north Essex, or look through our published prices across every service first if you are still setting a budget.

In this section
Flashing Failures on Pitched Roof Rooflights
Read moreNot Enough Daylight in a Loft Room
Read moreRafter Spacing and Rooflight Sizes
Read moreFitting Rooflights Into Slate Roofs
Read moreDraughty, Cold Loft Rooflights
Read moreConservation Rooflight Installation
Read moreFlush-Fit Rooflights for Pitched Roofs
Read moreRooflights for Loft Conversions
Read moreForming the Structural Opening in a Pitched Roof
Read moreChoosing and Fitting the Right Flashing Kit
Read morePitched Roof Rooflight Installation Costs
Read moreRooflight or Dormer for a Loft Conversion?
Read moreHow Is a Rooflight Fitted Into a Tiled Roof?
Read moreHow Many Rooflights Does a Loft Conversion Need?
Read moreCan a Rooflight Be Fitted Without Cutting Rafters?
Read moreHow Long Does It Take to Fit a Pitched Roof Rooflight?
Read moreWhat Is a Conservation Rooflight?
Read moreWhat Is the Minimum Roof Pitch for a Rooflight?
Read moreWhat Are the Fire Escape Rules for Loft Rooflights?
Read moreWhat Flashing Do You Need for a Slate Roof Rooflight?
Read moreWhy Does My Rooflight Leak Only in Driving Rain?
Read moreWhy Do Conservation Areas Restrict Rooflights?
Read moreWhy Replace Rather Than Repair a Rotten Rooflight?
Read moreShould You Replace Rooflights When Re-Roofing?
Read moreDo You Need Planning Permission for a Pitched Roof Rooflight?
Read moreHow Much Does a Loft Conversion Rooflight Cost?
Read moreHow Much Does a Conservation Rooflight Cost Fitted?
Read moreDoes Fitting a Rooflight Cost More on Slate Than Tile?
Read moreCentre Pivot or Top Hung Rooflight?
Read moreConservation or Standard Rooflight: Which Should You Fit?
Read moreWater Pouring Through a Loft Rooflight: What to Do
Read moreStorm Damaged Rooflight: Immediate Steps
Read moreThinking about this job? We survey across Ipswich, Suffolk and north Essex and give you a fixed price before any work starts, with a 10-year workmanship guarantee.